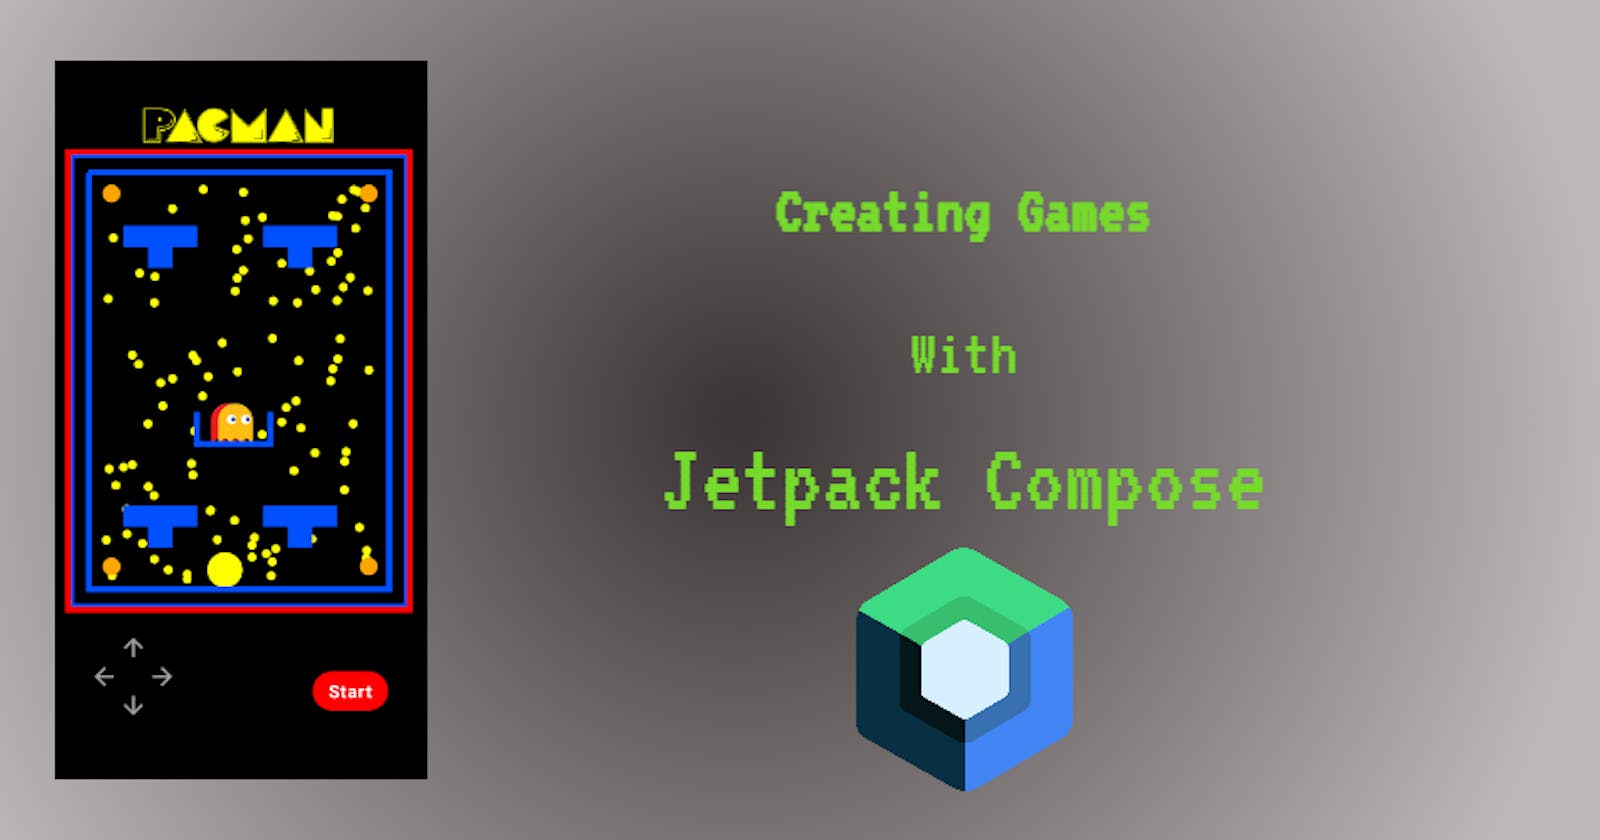
After learning enough Jetpack Compose to rebuild my PlayStore app Pibuddy, I wanted to try something totally different to further develop my Compose skills and also learn more about animations and canvas, I decided to have a go at building a retro-style game similar to Pacman but with a few simplifications to make it achievable. The full source code can be found on my GitHub here but if you want a more detailed summary then please read on further :). This is not a full walkthrough on how to create the game but will show the key elements of putting it all together.
Creating The UI
I wanted to implement a basic UI similar to a retro arcade screen, The layout would be a title with the name of the game followed by the Canvas which the game elements will be drawn onto, and then a simple directional pad for controls followed by a simple Start/Stop button.
The implementation of the UI and game elements can be seen in this class here.
Laying out the Game
I started off with a simple box with a red border and some padding, I then added a canvas to fill the max size of the box, I then drew two paths around the canvas to provide an area for the game elements to be placed in. I also drew a small box in the center where the enemies will be placed.
 val borderPath = Path()

 borderPath.apply {
                // border
                lineTo(size.width, 0f)
                lineTo(size.width, size.height)
                lineTo(0f, size.height)
                lineTo(0f, 0f)

                // second border
                moveTo(50f, 50f)
                lineTo(size.width - 50f, 50f)
                lineTo(size.width - 50f, size.height - 50f)
                lineTo(50f, size.height - 50f)
                lineTo(50f, 50f)

                // enemy box
                moveTo(size.width / 2 + 90f, size.height / 2 + 90f)
                lineTo(size.width / 2 + 90f, size.height / 2 + 180f)
                lineTo(size.width / 2 - 120f, size.height / 2 + 180f)
                lineTo(size.width / 2 - 120f, size.height / 2 + 90f)


            }

 drawPath(
                path = borderPath,
                color = PacmanMazeColor,
                style = Stroke(
                    width = 6.dp.toPx(),
                ),

                )
result : 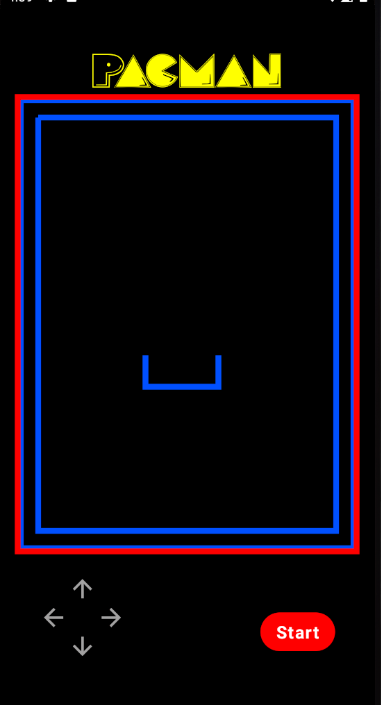
A similar approach is then used to create the four barriers, the only difference being the location of the paths and also that the path is filled in, this provides a solid shape.
val barrierPath = Path()

 barrierPath.apply {
                /*
                     barriers
                  __________
                 |___    ___|
                     |__|
                 */
                //left  top corner barrier
                moveTo(size.width / 4 + 60f, size.height / 4)
                lineTo(size.width / 4 - 20f, size.height / 4) // bottom
                lineTo(size.width / 4 - 20f, size.height / 4 - 60f) // left
                lineTo(size.width / 4 - 90f, size.height / 4 - 60f) // left angle
                lineTo(size.width / 4 - 90f, size.height / 4 - 120f) // left upward line to top
                lineTo(size.width / 4 + 120f, size.height / 4 - 120f) // top line
                lineTo(size.width / 4 + 120f, size.height / 4 - 60f) // line down to right
                lineTo(size.width / 4 + 50f, size.height / 4 - 60f) // line right to center
                lineTo(size.width / 4 + 50f, size.height / 4) // bottom line

                // right  top corner barrier
                moveTo(size.width / 1.5f + 60f, size.height / 4)
                lineTo(size.width / 1.5f - 20f, size.height / 4) // bottom
                lineTo(size.width / 1.5f - 20f, size.height / 4 - 60f) // left
                lineTo(size.width / 1.5f - 90f, size.height / 4 - 60f) // left angle
                lineTo(size.width / 1.5f - 90f, size.height / 4 - 120f) // left upward line to top
                lineTo(size.width / 1.5f + 120f, size.height / 4 - 120f) // top line
                lineTo(size.width / 1.5f + 120f, size.height / 4 - 60f) // line down to right
                lineTo(size.width / 1.5f + 50f, size.height / 4 - 60f) // line right to center
                lineTo(size.width / 1.5f + 50f, size.height / 4) // bottom line

                // right bottom corner barrier
                moveTo(size.width / 1.5f + 60f, size.height / 1.15f)
                lineTo(size.width / 1.5f - 20f, size.height / 1.15f) // bottom
                lineTo(size.width / 1.5f - 20f, size.height / 1.15f - 60f) // left
                lineTo(size.width / 1.5f - 90f, size.height / 1.15f - 60f) // left angle
                lineTo(
                    size.width / 1.5f - 90f,
                    size.height / 1.15f - 120f
                ) // left upward line to top
                lineTo(size.width / 1.5f + 120f, size.height / 1.15f - 120f) // top line
                lineTo(size.width / 1.5f + 120f, size.height / 1.15f - 60f) // line down to right
                lineTo(size.width / 1.5f + 50f, size.height / 1.15f - 60f) // line right to center
                lineTo(size.width / 1.5f + 50f, size.height / 1.15f) // bottom line

                //left  bottom corner barrier
                moveTo(size.width / 4 + 60f, size.height / 1.15f)
                lineTo(size.width / 4 - 20f, size.height / 1.15f) // bottom
                lineTo(size.width / 4 - 20f, size.height / 1.15f - 60f) // left
                lineTo(size.width / 4 - 90f, size.height / 1.15f - 60f) // left angle
                lineTo(size.width / 4 - 90f, size.height / 1.15f - 120f) // left upward line to top
                lineTo(size.width / 4 + 120f, size.height / 1.15f - 120f) // top line
                lineTo(size.width / 4 + 120f, size.height / 1.15f - 60f) // line down to right
                lineTo(size.width / 4 + 50f, size.height / 1.15f - 60f) // line right to center
                lineTo(size.width / 4 + 50f, size.height / 1.15f) // bottom line

            }

   drawPath(
                path = barrierPath,
                color = PacmanMazeColor,
                style = Fill,
            )
result : 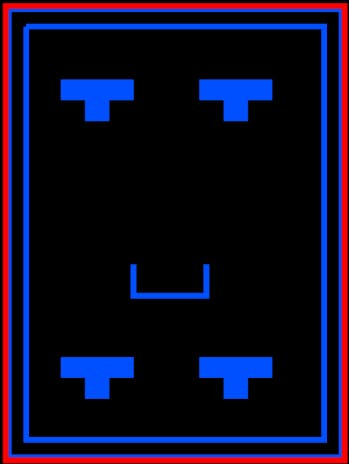
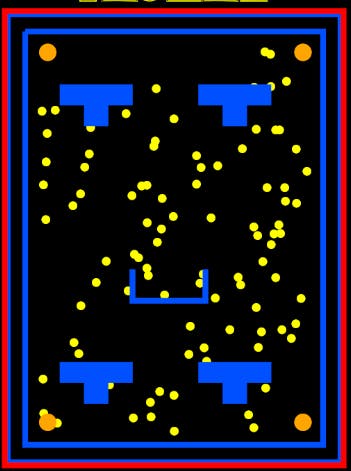
Drawing the food items was the next step I decided to tackle, there are two types of food in my simplified version of the Pacman game, the first type (ordinary food) is placed randomly over the canvas, and once all of them are eaten by the character the player then wins the game. The second food item (I decided to call these bonus food) when eaten will cause the enemies to go into "reverse mode" and return to the enemy box which will give the player some breathing space.
I decided I would have 100 ordinary food items placed randomly on the Canvas plus 4 bonus food items in each corner. In order to do this, I created a Kotlin data class called "PacFood" model which contains the needed values to plot the food on the screen, these are the X-axis position, Y-axis position, and the size (bonus Pacfood is double the size of ordinary food items). In the "init" block of this class, I execute two functions to create the lists for the bonus and ordinary food with the desired X and Y values and also the size. This list can then be accessed from our composable in order to draw out the items, These values are passed as mutable state and are initialized in a "remember" block so the values are retained during recomposition.
data class PacFood(
    val foodList: ArrayList<PacFoodModel> = ArrayList(),
    val bonusFoodList: ArrayList<PacFoodModel> = ArrayList() // bonus food which reverses the enemy path back to their box
) {
    init {
        initPacFoodList()
        initBonusPacFoodList()
    }

    private fun initPacFoodList() {
        foodList.clear()


                                        //100
        for (i in 0 until GameConstants.FOOD_COUNTER) {
            val food = PacFoodModel(
                xPos = Random.nextInt(85, 850),
                yPos = Random.nextInt(85, 1200),
                size = 0.5f
            )
            Log.w("food", "${food.xPos}")
            foodList.add(food)

        }
    }

    private fun initBonusPacFoodList() {
        bonusFoodList.clear()

        // topLeft
        bonusFoodList.add(
            PacFoodModel(
                xPos = 90,
                yPos = 85,
                size = 1f
            )
        )

        // top right
        bonusFoodList.add(PacFoodModel(
            xPos = 825,
            yPos = 85,
            size = 1f
        ))

        // bottom left
        bonusFoodList.add(PacFoodModel(
            xPos = 90,
            yPos = 1150,
            size = 1f
        ))

        // bottom Right
        bonusFoodList.add(PacFoodModel(
            xPos = 825,
            yPos = 1150,
            size = 1f
        ))


    }

    fun initRedraw() {
        initPacFoodList()
        initBonusPacFoodList()
    }
}


data class PacFoodModel(
    var xPos: Int,
    var yPos: Int,
    var size: Float
)
The food items are drawn using the simple loop functions below, the only difference is the colors.
            // food
            for (i in pacFoodState.foodList) {
                drawArc(
                    color = Color.Yellow,
                    startAngle = characterStartAngle ?: 30f,
                    sweepAngle = 360f,
                    useCenter = true,
                    topLeft = Offset(i.xPos.toFloat(), i.yPos.toFloat()),
                    size = Size(
                        radius * i.size,
                        radius * i.size
                    ),
                    style = Fill,

                    )
            }

            // Bonus Food
            for(i in pacFoodState.bonusFoodList){
                drawArc(
                    color = PacmanOrange,
                    startAngle = characterStartAngle ?: 30f,
                    sweepAngle = 360f,
                    useCenter = true,
                    topLeft = Offset(i.xPos.toFloat(), i.yPos.toFloat()),
                    size = Size(
                        radius * i.size,
                        radius * i.size
                    ),
                    style = Fill,
                )
            }
result:
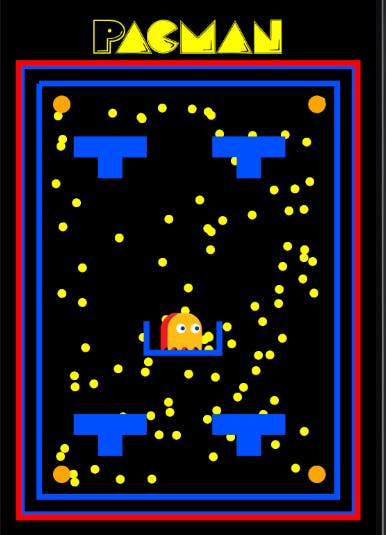
Instead of drawing the enemies using custom paths, I decided to simply draw the Images from a PNG file, I just needed to make sure the images were the same size and that their starting position should be in the enemy box with a bit of adjustment to ensure all enemies are visible. This is the first time we can see state being used in this project, I find this one of the most powerful things when building UIs in Jetpack Compose.
The enemies will be drawn with a different image depending on whether the game is in reverse mode or not, the position of the enemies will also change automatically as we are passing a mutable offset value to the "topLeft" parameter, whenever this value changes the enemy will get redrawn to the new position (more on this later, for now, we are just focusing on drawing out the game).
            drawImage(
                image = if(gameStatsModel.isReverseMode.value){
                    ImageBitmap.imageResource(res = resources, reverseEnemyDrawable)
                } else {
                    ImageBitmap.imageResource(res = resources, redEnemyDrawable)
                },
                topLeft = enemyMovementModel.redEnemyMovement.value

            )
            drawImage(
                image = if(gameStatsModel.isReverseMode.value){
                    ImageBitmap.imageResource(res = resources, reverseEnemyDrawable)
                } else {
                    ImageBitmap.imageResource(res = resources, orangeEnemyDrawable)
                },
                topLeft = enemyMovementModel.orangeEnemyMovement.value

            )
result:
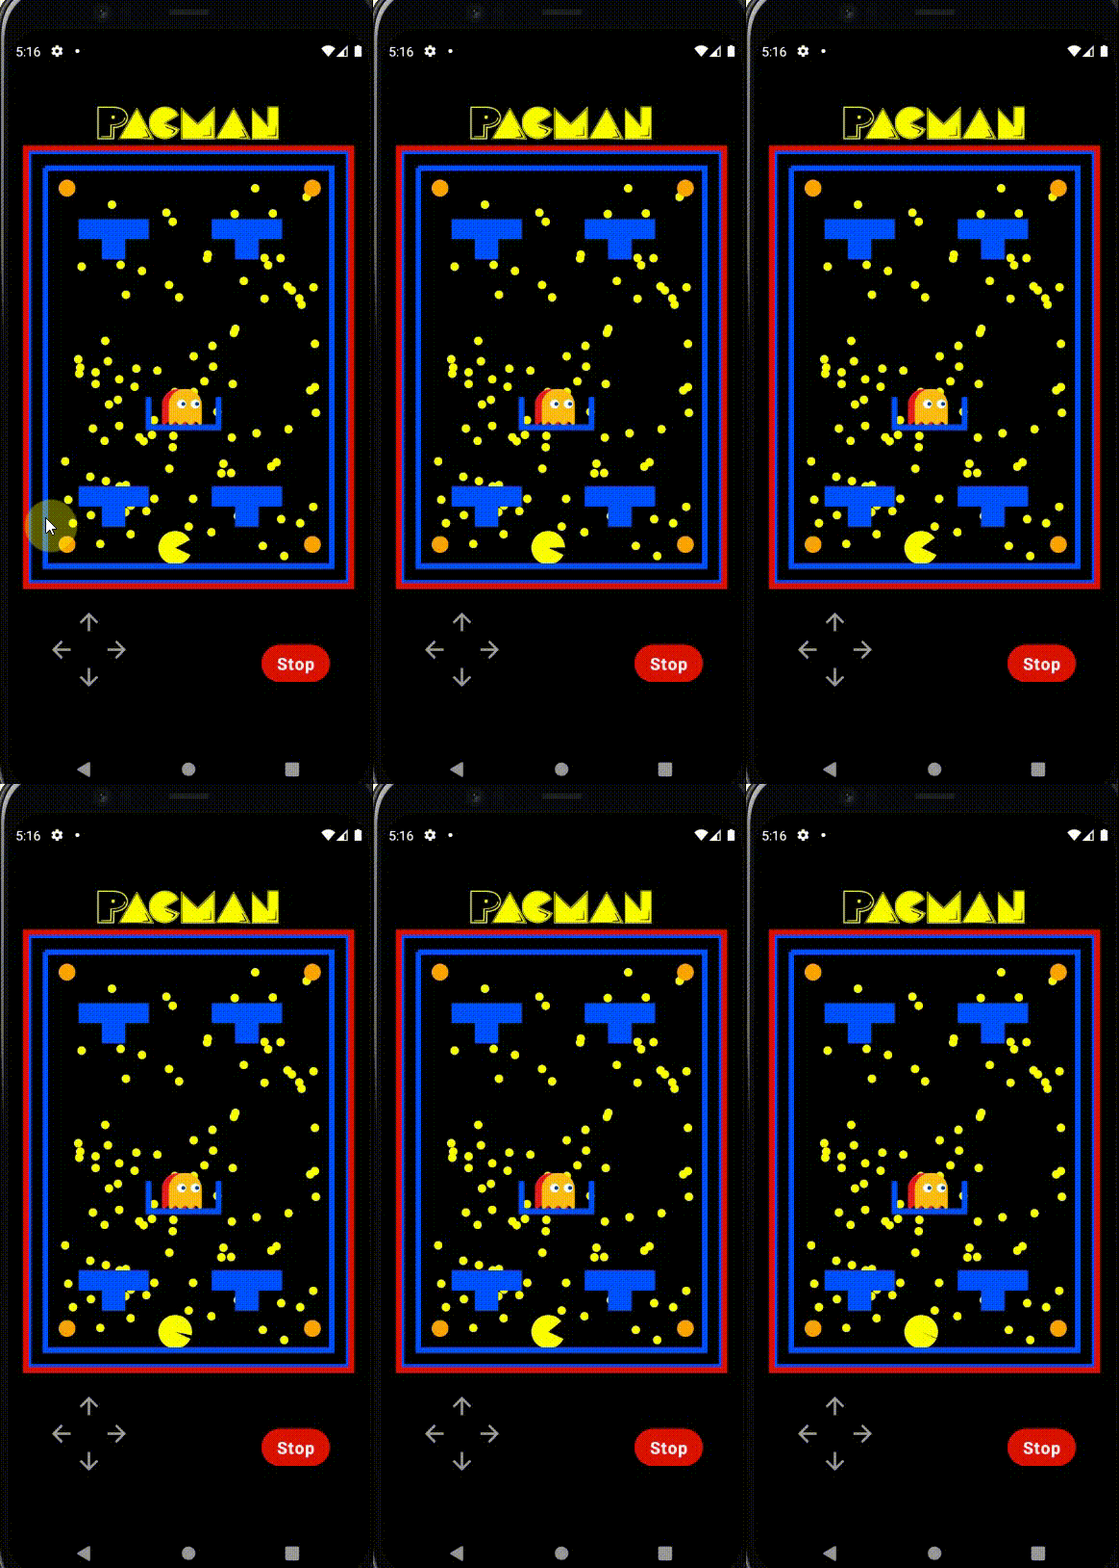
The Pacman character is drawn using a simple "drawArc" function but I am animating the "SweepAngle" float value between 360F and 280F depending on whether the game is started or not, this creates the chomping animation. This is using Infinite Transisition this means that the animation will repeat as long as the "isGameStartedValue" is true. The position of the character will start at the bottom of the screen positioned in the center and will be adjusted when the player presses any of the controls.
val infiniteTransition = rememberInfiniteTransition()
        val mouthAnimation by infiniteTransition.animateFloat(
            initialValue = 360F,
            targetValue = 280F,
            animationSpec = infiniteRepeatable(
                animation = tween(500, easing = LinearEasing),
                repeatMode = RepeatMode.Restart
            )
        )

        drawArc(
                color = Color.Yellow,
                startAngle = characterStartAngle ?: 30f,
                sweepAngle = if (gameStatsModel.isGameStarted.value) mouthAnimation else 360f * animateCharacterSweepAngle.value,
                useCenter = true,
                topLeft = Offset(
                    size.width / 2 - 90f + gameStatsModel.CharacterXOffset.value,
                    size.height - 155f + gameStatsModel.CharacterYOffset.value
                ),
                size = Size(
                    radius * 2,
                    radius * 2
                ),
                style = Fill,

                )
result:
Moving the Character
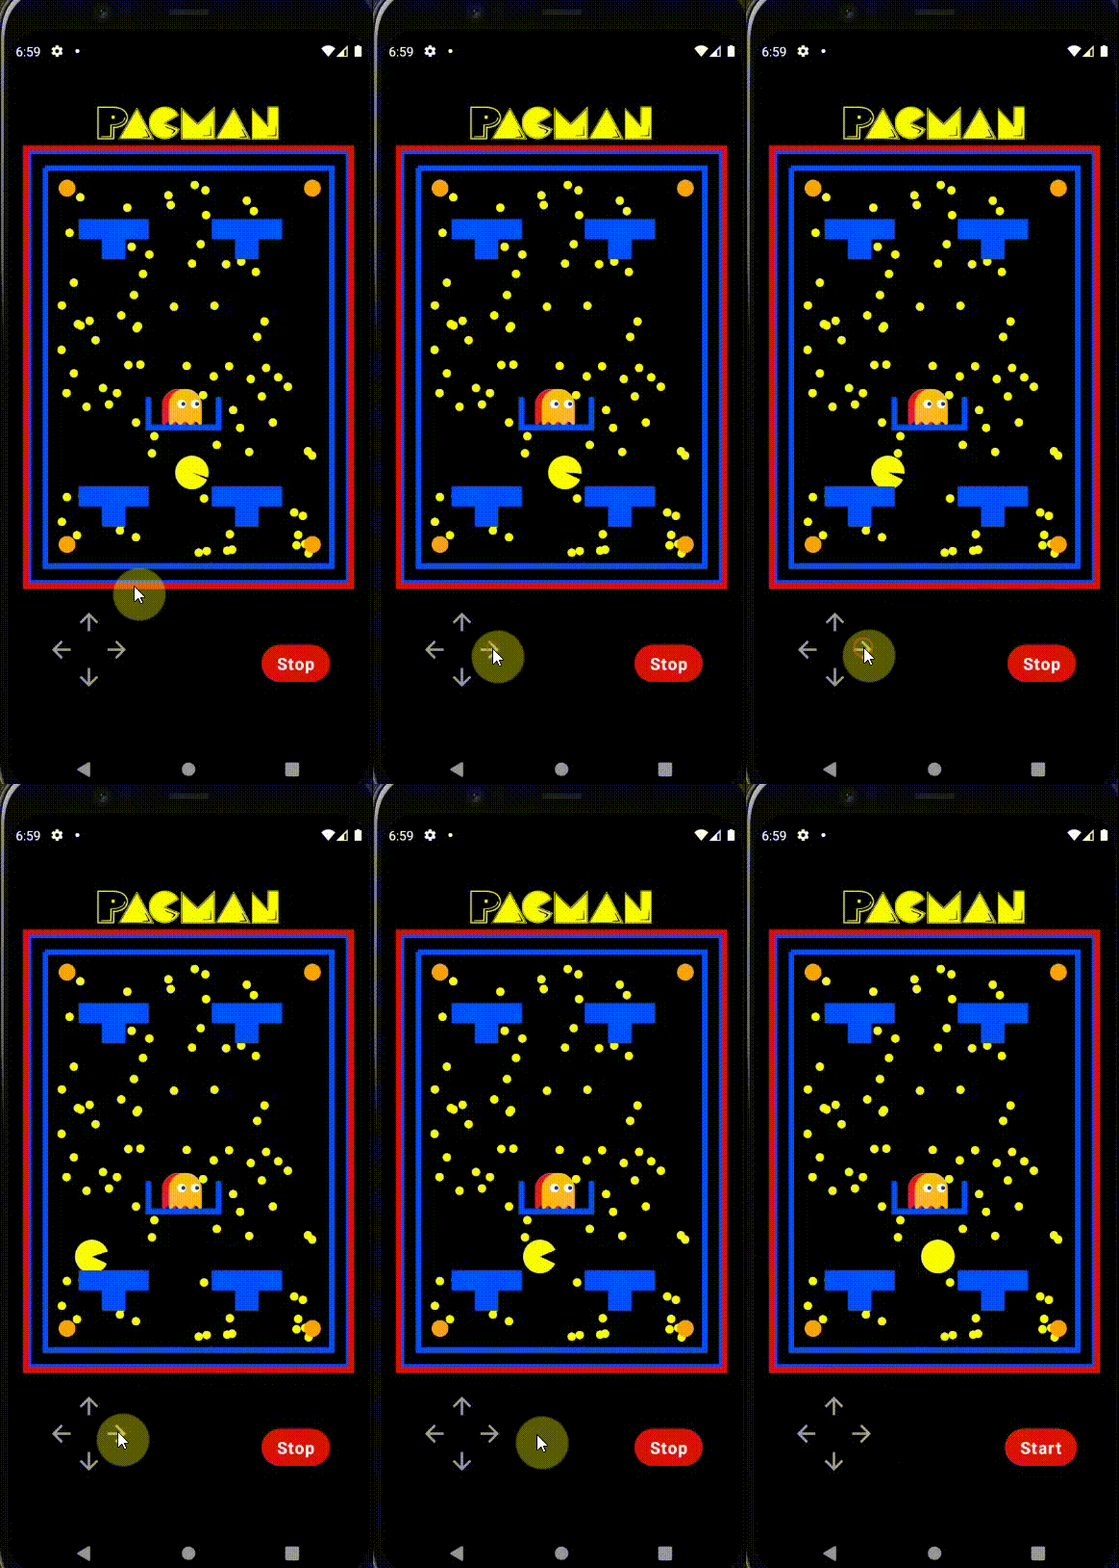
The next step is sorting out the player movement, I created the game control directional pad using 4 images for the UP, DOWN, RIGHT, and LEFT arrows, I then arranged these in a constraint layout to their desired positions ( Click here to find out more about Constraint Layout in Jetpack Compose ). I then added a long press listener to each image using the modifier.pointerInput method, when one of the arrow images has been "long-pressed" the corresponding method in the ViewModel will be called, this method will then increase/decrease the character Offset values (X and Y) to the new position and as these values are mutable the canvas will then redraw the character in the new position.
Once the viewModel method has been called the pointer input function will then await the release of the press, once the long-press has been released another function in the ViewModel will be called to stop the function adjusting the character position.
  Image(painter = painterResource(id = rightButtonDrawable),
                contentDescription = "Right Arrow",
                Modifier
                    .constrainAs(rightArrow) {
                        start.linkTo(upArrow.end)
                        bottom.linkTo(parent.bottom)
                    }
                    .size(30.dp)
                    .pointerInput(Unit) {
                        detectTapGestures(
                            onPress = {
                                if (gameStatsModel.isGameStarted.value) {
                                    gameViewModel.rightPress(
                                        characterYOffset = gameStatsModel.CharacterYOffset,
                                        characterXOffset = gameStatsModel.CharacterXOffset
                                    )
                                    tryAwaitRelease()
                                    gameViewModel.releaseRight()
                                }
                            }
                        )
                    }

            )
An example of this implementation is shown below, I created an Initial Boolean value for "rightPress" and this function sets it to true as soon as it is called, then we have to manage the barriers and borders (We don't want the character to run off the game area or go through the barriers) to do this we check the character position and if it is within a specified range of the barriers or game border then we will not increase the X value and the player won't move, If the character position is not within this range then the CharacterXOffset value will be incremented and the character will move accordingly.
The right and left functions will also change the character position to the opposite side if they try to go through the border (see next example).
Full ViewModel class here
    fun rightPress(characterXOffset: MutableState<Float>, characterYOffset: MutableState<Float>) {
        rightPress = true
        _characterStartAngle.postValue(25f) // change direction character is facing
        viewModelScope.launch {
            while (rightPress) {
                delay(500)
                // move character to opposite wall
                if (characterXOffset.value > 315f) characterXOffset.value = -400f

                // implement barrier constraints

                if (
                //Top Right
                    Range.create(-310f, -225f).contains(characterXOffset.value) &&
                    Range.create(-975f, -900f).contains(characterYOffset.value) ||
                // Top Left
                    Range.create(75f, 150f).contains(characterXOffset.value) &&
                    Range.create(-975f, -900f).contains(characterYOffset.value) ||
                // EnemyBox
                    Range.create(-150f, -75f).contains(characterXOffset.value) &&
                    Range.create(-450f, -375f).contains(characterYOffset.value) ||
                // Bottom Left
                    Range.create(-310f, -225f).contains(characterXOffset.value) &&
                    Range.create(-150f, -75f).contains(characterYOffset.value) ||
                // Bottom Right
                    Range.create(75f, 150f).contains(characterXOffset.value) &&
                    Range.create(-150f, -75f).contains(characterYOffset.value)

                ) characterXOffset.value += 0f else characterXOffset.value += incrementValue

                Log.d(
                    logTag,
                    "rightpress: x:  ${characterXOffset.value} y: ${characterYOffset.value}"
                )

            }
        }
    }

// called when long press has been released and stops the right press while loop
fun releaseRight() {
        rightPress = false
    }
result:
Enemies
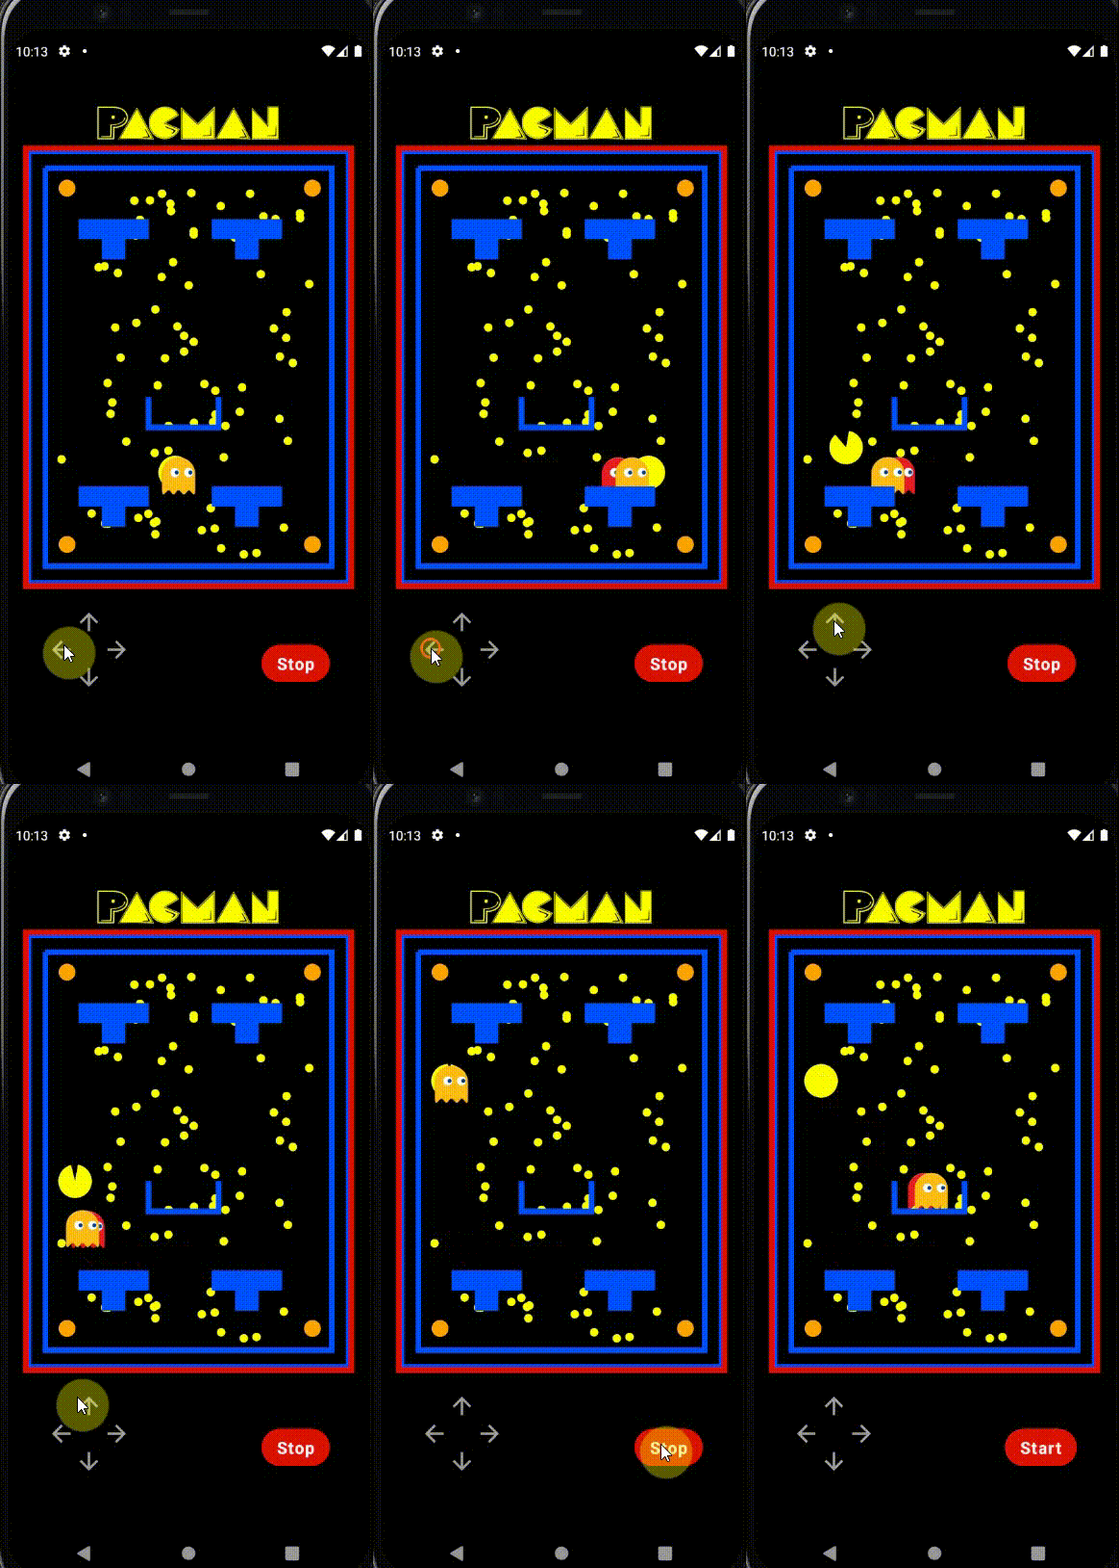
The next step is moving the enemies, I wanted the enemies to chase the player and also to give each enemy a unique speed. To accomplish this I used "animateFloatAsState" with a target value of the character position, this animation will only be triggered if the game is started and is not in reverse mode, if the game is not started or the game is in reverse mode then the enemy position will be set to the enemy box.
/*
    function to provide an Offset to set enemy position, enemies position is animated to the
    position of the character if the game has started
    */

@Composable
fun enemyMovement(duration: Int, gameStats: GameStatsModel, initialXOffset: Float): Offset {
    // X Axis
    val enemyMovementXAxis by animateFloatAsState(
        targetValue = if (gameStats.isReverseMode.value || !gameStats.isGameStarted.value) {
            958.0f / 2 - initialXOffset // (return to original position )create spacing between enemies in box
        } else {
            958.0f / 2 - 90f + gameStats.CharacterXOffset.value

        },
        animationSpec = tween(duration, easing = LinearEasing),
        finishedListener = {

        }

    )

    // y Axis
    val enemyMovementYAxis by animateFloatAsState(
        //if game has not started or the game is in reverse mode then move enemies back to enemy box
        targetValue =  if (gameStats.isReverseMode.value || !gameStats.isGameStarted.value) {
            1290.0f / 2 + 60f
        } else {
            1290.0f - 155f + gameStats.CharacterYOffset.value
        },
        animationSpec = tween(duration, easing = LinearEasing),
        finishedListener = {
        }
    )

    return Offset(enemyMovementXAxis, enemyMovementYAxis)


}

 // define enemy values with different initial positions and different speed

        //Red Enemy
        enemyMovementModel.redEnemyMovement.value = enemyMovement(
            duration = GameConstants.RED_ENEMY_SPEED,
            gameStats = gameStatsModel,
            initialXOffset = 90f
        )

        // Orange Enemy
        enemyMovementModel.orangeEnemyMovement.value = enemyMovement(
            duration = GameConstants.ORANGE_ENEMY_SPEED,
            gameStats = gameStatsModel,
            initialXOffset = 70f
        )


// draw enemies on Canvas

drawImage(
                image = if(gameStatsModel.isReverseMode.value){
                    ImageBitmap.imageResource(res = resources, reverseEnemyDrawable)
                } else {
                    ImageBitmap.imageResource(res = resources, redEnemyDrawable)
                },
                topLeft = enemyMovementModel.redEnemyMovement.value

            )
            drawImage(
                image = if(gameStatsModel.isReverseMode.value){
                    ImageBitmap.imageResource(res = resources, reverseEnemyDrawable)
                } else {
                    ImageBitmap.imageResource(res = resources, orangeEnemyDrawable)
                },
                topLeft = enemyMovementModel.orangeEnemyMovement.value

            )
We can see from the below gif that when the game is started the enemies position will be animated to the position of the character and as that position is a mutable value and is updated as the player moves the character, then the animation target value for the enemies will also change, I have also given each enemy animation a different duration so that enemies will reach the character at different speeds. When the game is stopped the enemies will then animate back to their start positions.
result :
Collision Detection
In order for the game to work correctly, I needed to be able to detect collisions for when the player is near the food items and also when the enemies have reached the player. The first step to this was creating a kotlin data class to keep track of the mutable values that are important to the game such as the character and enemy positions and also the food item positions (shown earlier in the PacFoodModel https://github.com/danielmbutler/Pacman_Compose/blob/master/app/src/main/java/com/dbtechprojects/pacmancompose/models/PacFood.kt ).
These values are defined at the start of MainActivity and are updated by various methods as the game is played. I created a "gameloop" method to keep track of these values while the game was in a started state and execute certain functions once a collision occurs.
data class GameStatsModel(
    val CharacterXOffset: MutableState<Float>,
    val CharacterYOffset: MutableState<Float>,
    val isGameStarted: MutableState<Boolean>,
    val isReverseMode: MutableState<Boolean>

)

data class EnemyMovementModel (
    val redEnemyMovement: MutableState<Offset> = mutableStateOf(Offset(0F, 0F)),
    val orangeEnemyMovement: MutableState<Offset> = mutableStateOf(Offset(0F, 0F))
)
The gameloop function is shown below, firstly the collision detection for the PacFood items is handled, this is done by using an IF statement to check the current position of the character and if it is within a range of 100F of the food item's position. If this evaluates to true then the food counter will be decremented and the item will be redrawn to an area that is not visible, this creates the "eating" effect. The same thing is done for the bonus food but if the collision check is true then reverseMode will be turned on.
 private fun gameLoop(
        foodCounter: MutableState<Int>,
        pacFoodState: PacFood,
        enemyMovementModel: EnemyMovementModel,
        gameStatsModel: GameStatsModel,
    ) {

        if (gameStatsModel.isGameStarted.value) {
            // Collision Check
            val characterX = 958.0f / 2 - 90f + gameStatsModel.CharacterXOffset.value
            val characterY = 1290.0f - 155f + gameStatsModel.CharacterYOffset.value

            // normal food collision
            pacFoodState.foodList.forEach { foodModel ->
                if (
                    Range.create(characterX, characterX + 100).contains(foodModel.xPos.toFloat()) &&
                    Range.create(characterY, characterY + 100).contains(foodModel.yPos.toFloat())
                ) {
                    // redraw outside box with 0 size and increment score by 1
                    foodModel.xPos = 1000
                    foodModel.yPos = 2000
                    foodCounter.value -= 1
                }
            }

            // bonus food collision
            pacFoodState.bonusFoodList.forEach { foodModel ->
                if (
                    Range.create(characterX, characterX + 100).contains(foodModel.xPos.toFloat()) &&
                    Range.create(characterY, characterY + 100).contains(foodModel.yPos.toFloat())
                ) {
                    // redraw outside box with 0 size
                    reverseMode.value = true
                    foodModel.xPos = 1000
                    foodModel.yPos = 2000
                }
            }

            // reverse mode detection
            if(enemyMovementModel.orangeEnemyMovement.value.x == 409.0f &&
               enemyMovementModel.orangeEnemyMovement.value.y == 705.0f &&
               enemyMovementModel.redEnemyMovement.value.x == 389.0f &&
               enemyMovementModel.redEnemyMovement.value.y == 705.0f
            ){
                /*
                 if these conditions are true the game is either started or the reverse animation has finished
                 as the enemies are in their original positions (inside the enemy box)
                 so reverseMode should be set to false.
                 */
                gameStatsModel.isReverseMode.value = false
            }


            if (
            // if enemy is within 25f of character then a collision has occurred and the game should stop
                Range.create(characterX, characterX + 25).contains(
                    enemyMovementModel.redEnemyMovement.value.x
                ) &&
                Range.create(characterY, characterY + 25).contains(
                    enemyMovementModel.redEnemyMovement.value.y
                ) ||
                Range.create(characterX, characterX + 25).contains(
                    enemyMovementModel.orangeEnemyMovement.value.x
                ) &&
                Range.create(characterY, characterY + 25).contains(
                    enemyMovementModel.orangeEnemyMovement.value.y
                )

            ) {
                // gameOver, stop game and show dialog
                resetGame("GAME OVER")

            }

            // win logic
            if (foodCounter.value == 0) {
                resetGame("YOU WON !")
            }


        }
    }
The final collision detection is for the enemies, so if the character's position is within 25F of the enemy's position then the reset game function will be called and the game will stop. The powerful elements of this function are that it always running while the "isGamestarted" value is true and The position values for the character, enemies, and food are mutable so they are continuously being updated.
Player Death/ Player Win Events
There are two events where the game should end, either the player wins by consuming all of the food items or the player loses by getting caught by the enemies. These events are being tracked in the gameLoop function mentioned earlier. If either of the events occur we execute the resetGame method below which will display a dialog and reset the game elements, this is done by setting the isGamestarted value to false and also redrawing the food items.
    private fun resetGame(message: String) {
        gameStarted.value = false
        gameOverDialogState.shouldShow.value = true
        gameOverDialogState.message.value = message
        foodCounter.value = GameConstants.FOOD_COUNTER // reset counter
        pacFoodState.initRedraw()
        // reset character position
        characterXOffset.value = 0f
        characterYOffset.value = 0f

    }
Finished Game Play
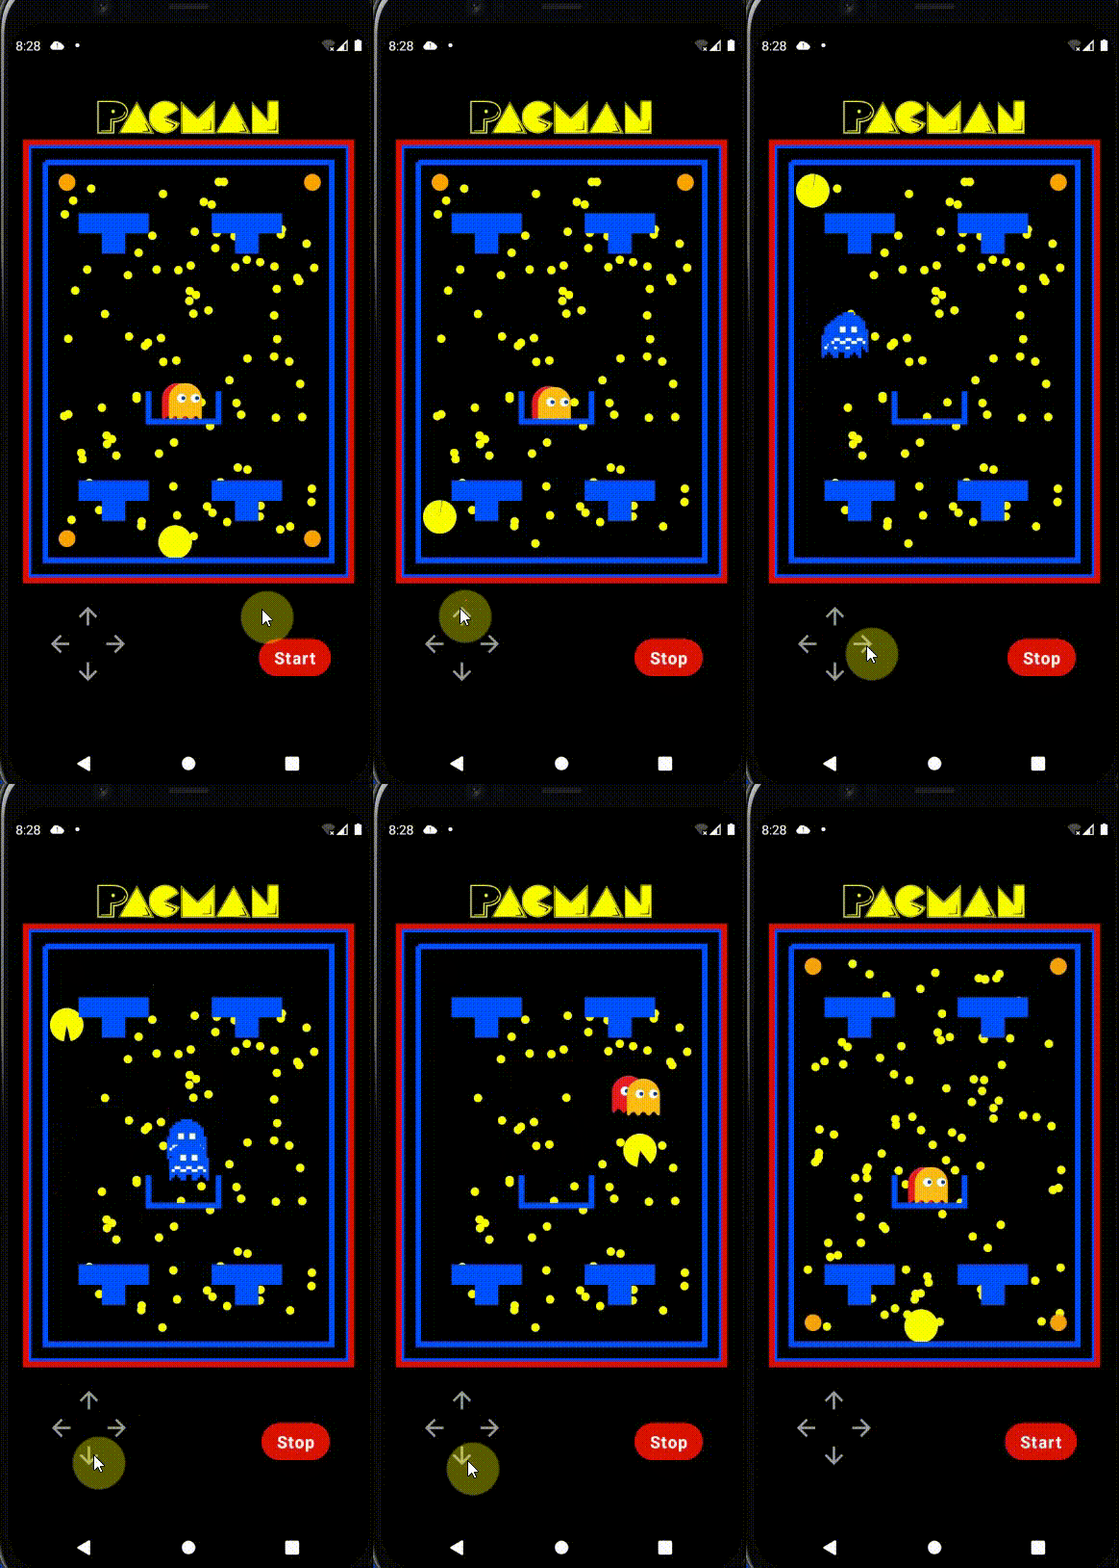
Conclusion
I hope this article can show you just how easy building simple games and creating animations can be with Jetpack Compose, this was the first game I created and I am relatively new to Android Development in general, what really helped me in this process was the detailed google documentation and also the wide range of great community projects to learn from. If you have any questions or would like to contribute to this game please reach out to me on Twitter below.
Thanks for reading.
Resources
Further Reading
If you're looking to dive deeper into creating games with Jetpack compose I would recommend the below articles and projects.
Creating a Retro Style game in compose by Thomas Künneth
Chetan Gupta's github has many great compose animation projects that you should check out here
